With the boom of e-commerce, the need for good product photography is global as more and more brands compete for attention in the online marketplace. It has become as popular as an online business.
It is also a crucial part of offline advertising as well; good pictures of items are necessary for ads in magazines, hoardings, catalogs, and flyers. So, there is no option to avoid the importance of product shoot in business, be it offline or online.
If you want to be a master of product photography, you need more and more practice and spending time on shooting in the right way. So, what’s the right way? Let’s check out how you can practice product photography to improve your skill.
What is Product Photography?
Product photography means photographing any good for the purpose of making a sale by showing it as appealing as possible. This is also known as commercial photography. With the rise of e-commerce businesses, this photography genre has made its place in the market too.
Though photographing products sounds quite simple, it actually is not. Many big e-commerce businesses rely largely on ecommerce photography. This is the one single thing that has a huge impact on sales. Be it online or offline, attractive visuals are important for presenting products.
Types of Product Photography
Product photography includes diversified styles and formats. Based on different criteria, product photography can be split up into several types. Check out the most common kinds of product photography –
Based on the Number of Objects in a Shot:
Individual Shots
Individual product photography means photographing one single product. It means there will be one product in one image. This is quite simple, but still a very important shot. This is the basic shot that every product will need.
Group Shots
Group product photography is shooting a collection of products. In the group shot, the products are connected with one another. For example, the products can be from the same company or can be the same kinds of products, like watch collections.
Based on Size & Dimensions:
Regular sized
To simplify this, regular sized products are those that fit in the studio. We can keep the product on a surface and take photos. These are not that big in size and don’t take much space. From watches to mobile phones to glassware all are regular sized products.
Large product
Large products are bigger than regular ones. Large vehicles like cars, or sofa sets, or beds, all are large products. While shooting large products, photographers often use dummies instead of the product itself. Otherwise, these can be shot outside too.
Based on Shot Type:
Packaging shot
Packaging shot is also called packshot. This simply means the image of a product with the label. An image of a product, be it still or moving which shows the product, as well as the details of packaging, is the packaging shot.
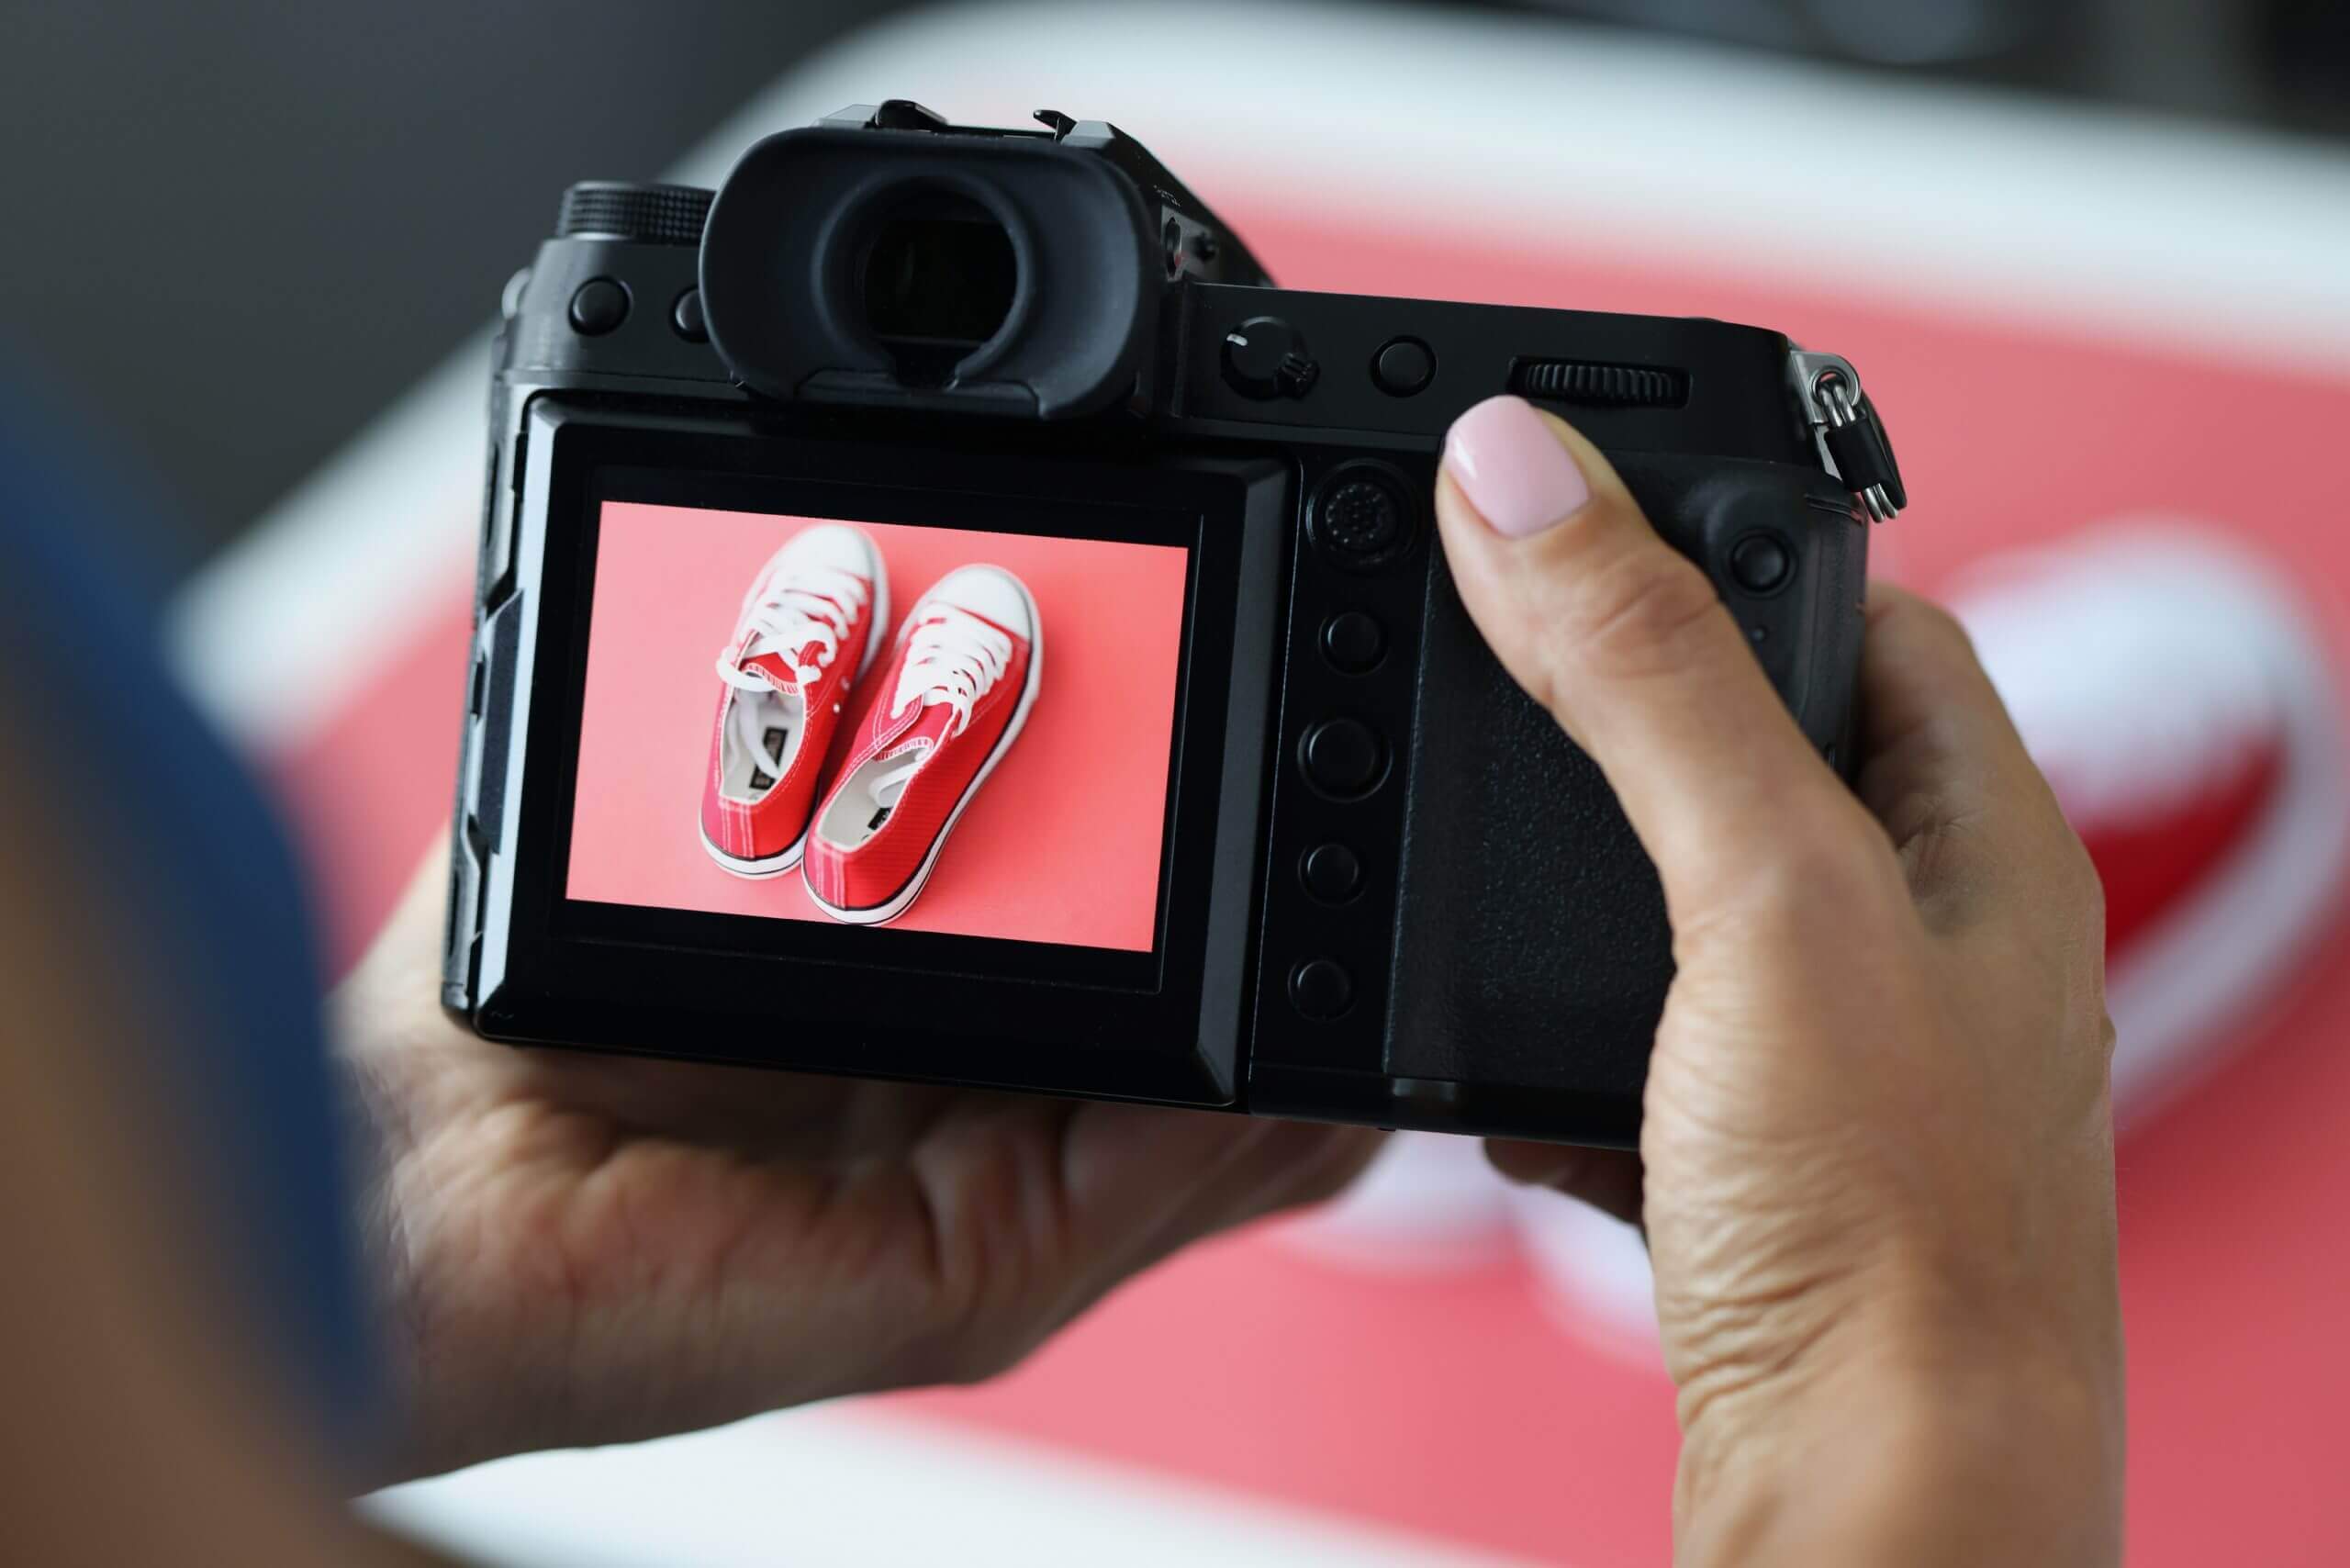
White background shots
These are the images with plain and clean white backgrounds. White background shots are the most common type of photography for product shots. It gained popularity because of its versatility and simplicity.
White backgrounds are basically like potatoes. You can use it everywhere you want, with any kind of product. Even many big e-commerce businesses want plain white background images. So, no matter what kind of product shoot you do, you need to know the working process of white backgrounds.
Flat lay / Simple studio shots
Flat lay photography means shooting from the above. There are product images that are shot from the above. These kinds of images don’t require any extra props to support the image.
The same goes for simple studio shots. These are just clean, good studio images without any props. Mostly with plain backgrounds. This can be counted as the basic image of a product.
Scale Shots
Scale shots are those where you give the image a reference or comparison of the size. This is something where you can easily understand the what’s the size of the product. For example, if it’s a bag, you can make your model wear the bag so that customers can have an idea of how big the bag is.
Detail / close up / macro Shots
Close-up or macro shots are basically for bringing out the details of the product. Macro shots are mostly used to show a certain part of a product. These kinds of shots work well on small-sized products too. You can show the texture and quality of the product by taking detailed shots.
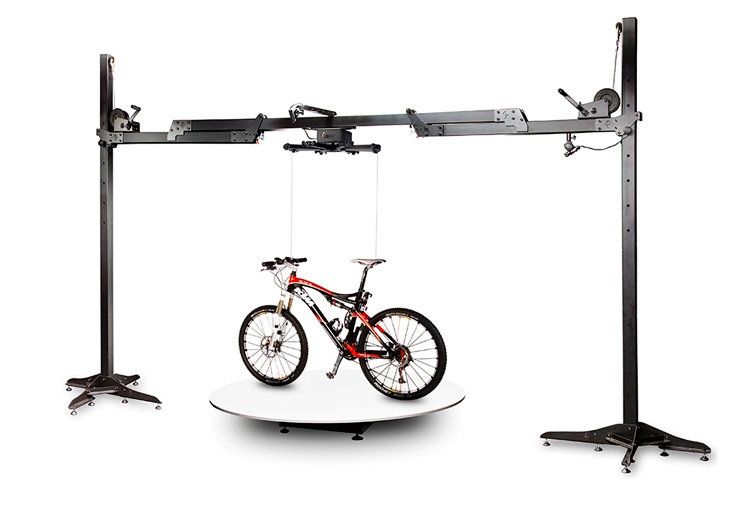
360 Product Photos
360 product photography is the moving image of a product that shows all the dimensions of a product. This is basically a series of images where all the images together make a complete image and give the impression that the product is rotating.
Based on the Props Used:
Hanging
As the name says, hanging product photography means hanging the products with something. It can be anything from the ribbon to the hanger. This is a unique way of presenting products. But it’s difficult to apply on heavy products. Still, there is enough possibility to utilize creativity here.
Mannequin
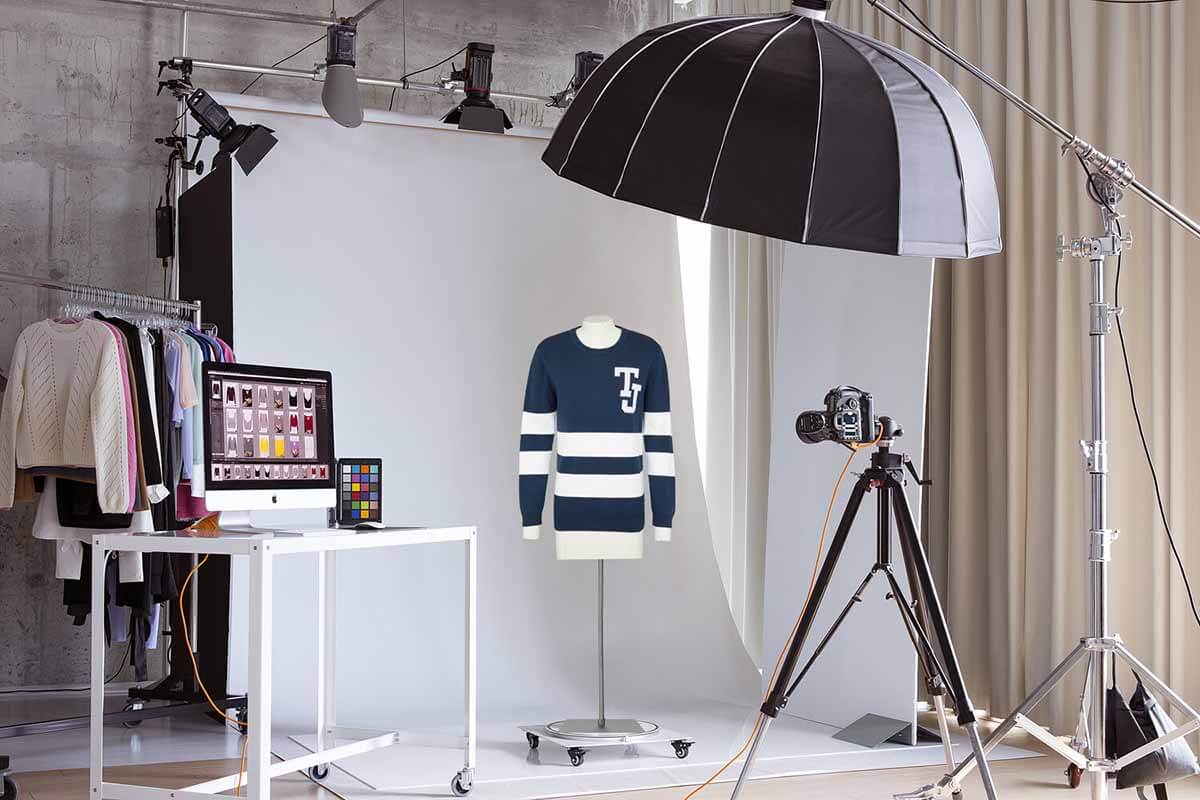
Mannequin photography requires using a doll or mannequin instead of a model. Using a mannequin is cost-friendly and convenient as you won’t have to spend on models. There is the option to remove the mannequin in post-processing too.
One benefit of using a mannequin is that customers can imagine what it may look like after wearing it and they can have an idea about the form and shape of the product.
Based on Purpose:
Infographics
Infographic photography is that, which includes information about the product in the image. Infographic design images are quite powerful to convey messages. You can add key features or basic information about your product with the image. This helps customers to have an overall idea about the product without reading the whole description.
Lifestyle Shots
Lifestyle photography basically includes the product in daily life. What that means is, rather than shooting the product separately, you’ll set the product in a scene and show how it can be a part of your customers’ daily life. Lifestyle photography is more engaging because customers can relate the product with their life. So it can generate higher sales.
How to Do Product Photography?
Product photography is something that has become one of the top photography genres these days. This is inseparable from e-commerce business. Product photoshoot usually follows specific techniques. So, if you understand the basics, it won’t be tough for you too. Learn with us how to do product photography –
1. Get The Right Background for Photography
Getting the right background is essential if you want to sell your products online. A white background is a popular choice for product shoots. Many e-commerce sites want a basic photo with white background. So, you’ll definitely need a white background no matter what you do.
Other than that, you can have a black background so that you can use it while necessary. You can use a variety of other backgrounds too. But don’t use any messy background that takes away your viewers’ attention from the subject.
Having a clean and well-thought-through background is the groundwork that can save you a load of potential editing work later. A white background is your best bet. You can make your own light tent for small products – they’re relatively inexpensive to mimic and can make a world of difference to your photos.
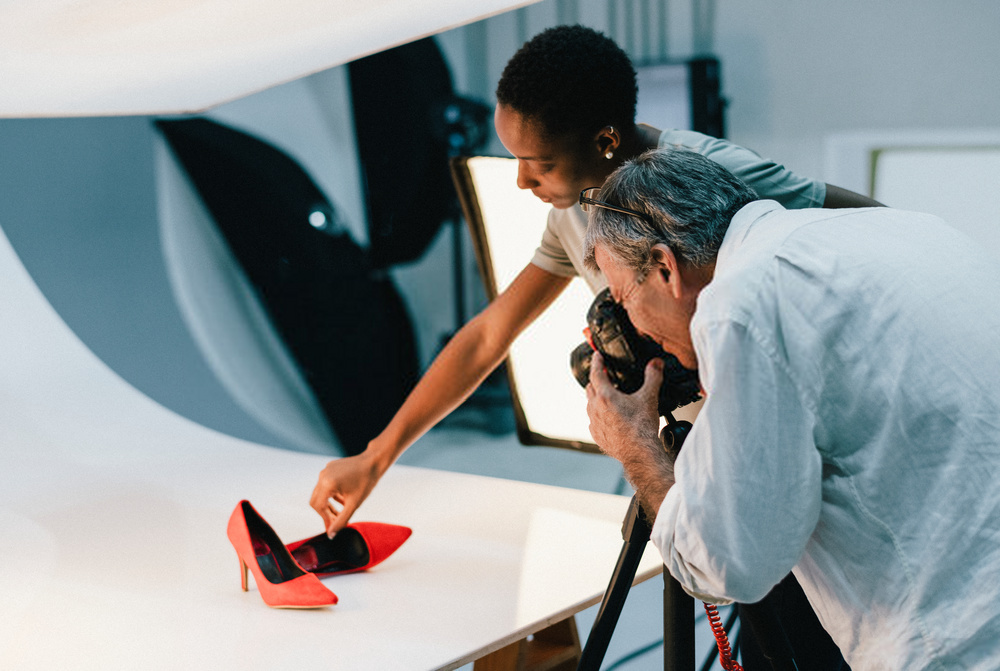
2. Prep Your Product for Photography

To start your shoot, you need some preparation. Cleaning your product carefully and having a good placement for the product is a must.
Before photographing, clean your product carefully, so that no dust shows up in the image. Make sure your products are clean, with no scratch at all, new and flawless. Check if the label is clearly visible.
The best place for a product to be on is a flat surface so that it is stable and not prone to movement or overlap (in the case of flexible items such as fabric or chains). For products such as necklaces, placement on a bust or cardboard is preferable to get a more professional shot.
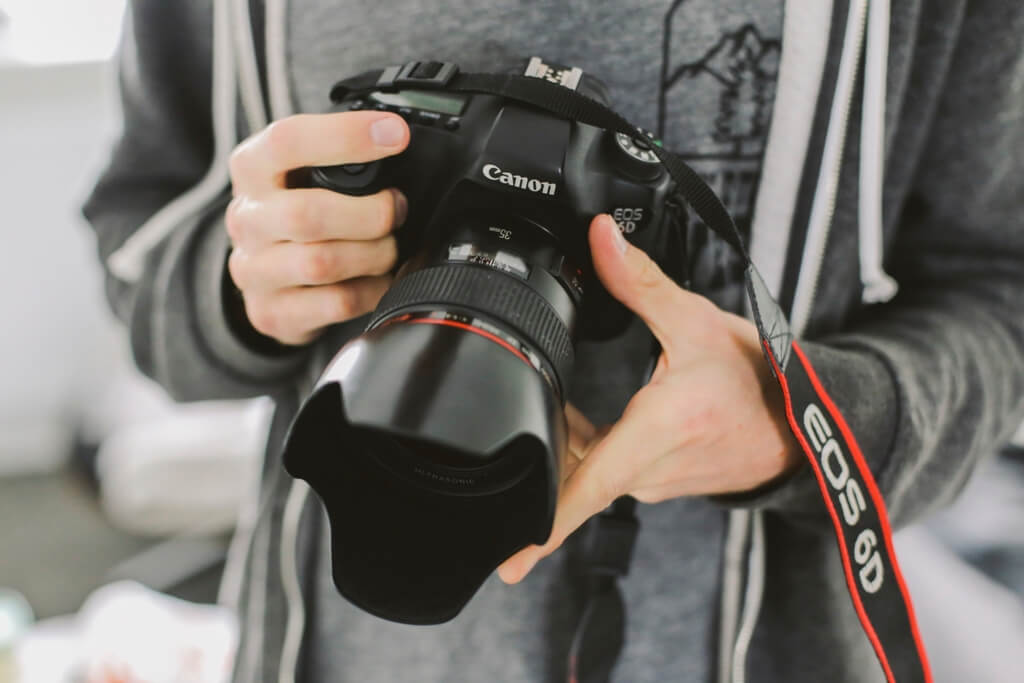
3. The Right Camera for Product Photography
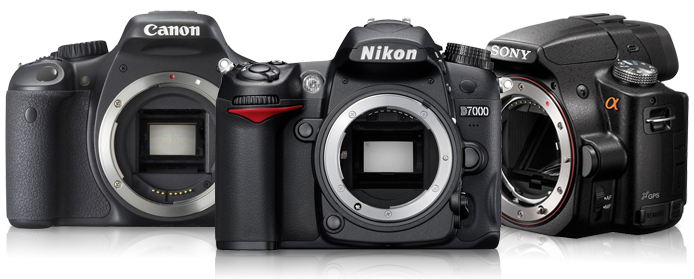
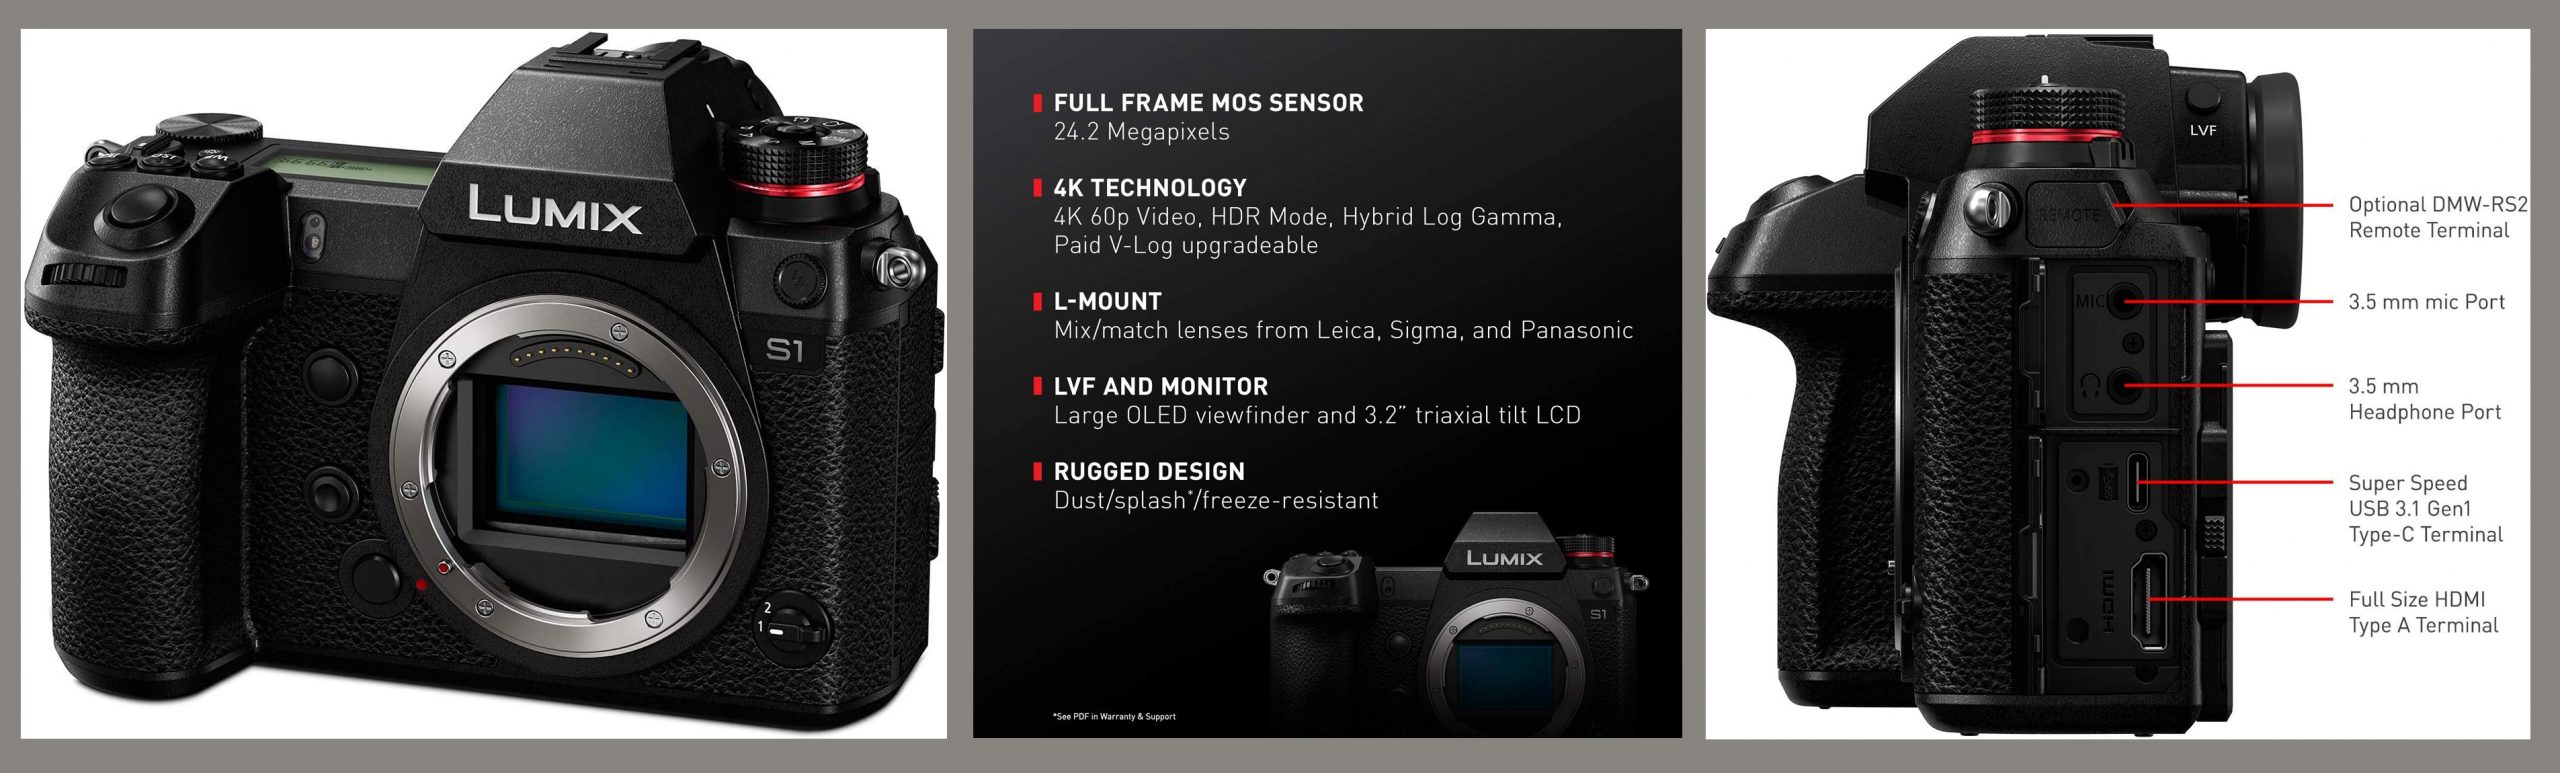
If you are doing a large number of product shots regularly, it is worth spending money on the best cameras for product photography. Thanks to the emergence of great smartphone cameras, the prices of DSLRs and point-and-shoot cameras have lowered over the years and are now quite affordable.
While choosing a camera for professional photography, keep in mind that you will have to pick a sharp lens. Some of the best cameras for product photography are Panasonic Lumix FZ80 4K, Nikon D750, Canon EOS 5D Mark IV, Canon EOS Rebel T6, Nikon D7500, Canon EOS Rebel T7i US.
Prime lenses are best for product photoshoot. Also, you might need a macro lens to shoot small products.
Also Read, Best Camera Lenses for Product Photography.
3.1. Best Camera Setting
Your camera settings basically depend on you and your products. Still, there are some basics that you can follow –
- Keep ISO as low as possible to avoid grain.
- Keep the aperture number low if your product is small and has no layer. And make it high if your product is not so small. Make sure the part you want to show is in focus.
- Adjust shutter speed based on ISO & Aperture. Using slow shutter speed won’t be an issue if you’re using a tripod.
- Set the white balance properly using a gray card so that you can bring out the actual color of your product.
4. Get A Tripod
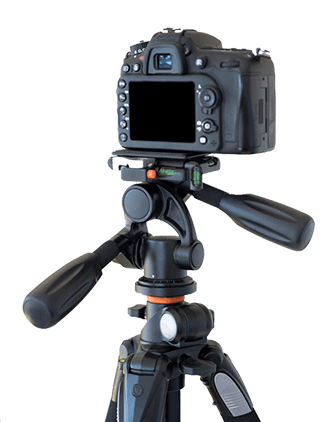
Investing in a tripod gives you access to a wide range of benefits and it’s an essential component for good product photographs. A tripod can help with focusing. It adds stability to your setup and can give you consistently good pictures.
If you don’t have the budget to buy a tripod for master product photography, you can use a chair, table, or box to place your camera. However, a tripod is likely to last many years and makes a sound investment in obtaining great product shots.
5. Use Simple Props
Keep in mind that simplicity is an asset while doing product photoshoot. The ‘less is more’ rule can easily be applied to the composition. Decorating your frame using simple and minimal props will bring an elegant look to your photograph.
For example, while doing food photography, you can use some spices as props. Or while taking photos of perfume, use a hint of the smell, like a flower. You can also use color powders or simple natural elements as props. Sometimes just a ribbon or a stick can be your props.
You can use anything and everything as your props. Think about what goes with your product and experiment with props.
6. Choose Your Lighting for Product Photography
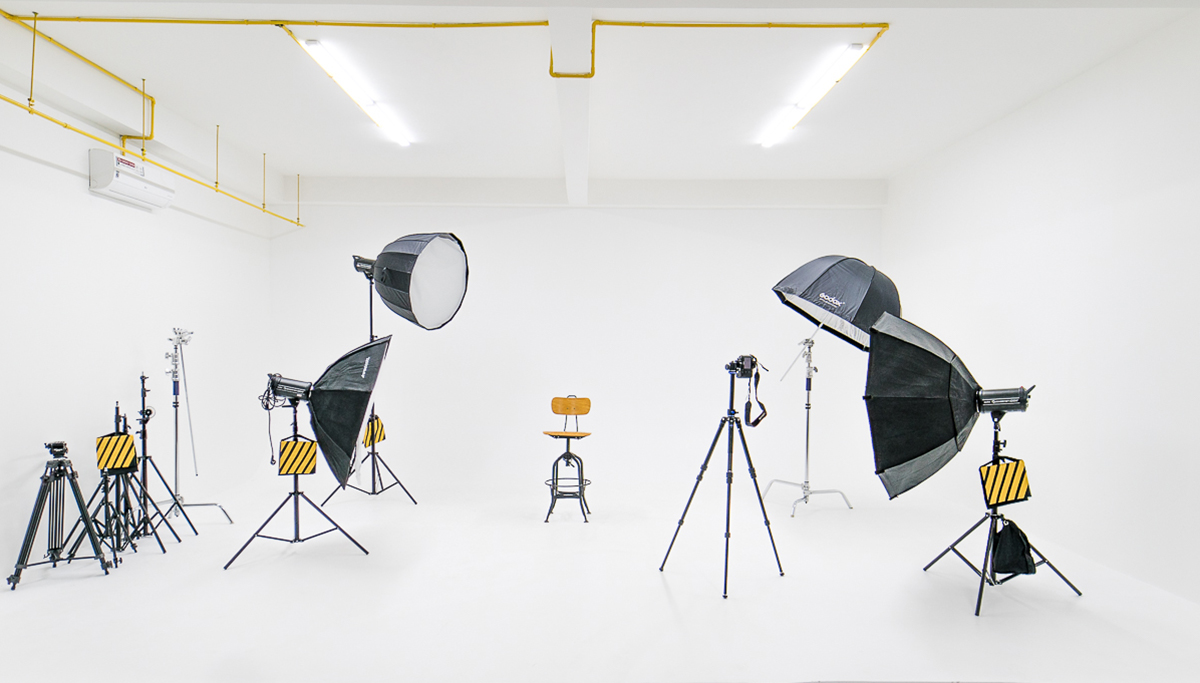
There are two kinds of lighting conditions that you can use for product photography. Natural and Artificial lighting. If you know how light works, you can utilize both kinds of lights.
6.1. Natural Lighting
If you are watching your expenditure, natural light is your best option, especially for small-scale shoots. If your window gets sunlight that is too direct and you feel it is making your photos look washed out, diffuse the rays with a white cloth placed over the glass. Choose a shooting time when the light is bright so that you can adjust according to your needs.
Remember that it’s easier to edit photos to adjust their lighting down than increase the lighting. When shooting with natural light, keep an eye on the shadows as direct sunlight can result in prominent and distracting shadows.
6.2. Artificial Lighting
If you have a decent budget, studio lighting can get the job done at any time of day and is recommended for shooting many products over the course of the day.
To get natural shadows, you will need to have two softbox light setups at the very least – one as your primary light source and another according to your need – to fill in adjustments or as a backlight. Apart from these, you might need a diffuser to reduce the hardness of the light.
7. Product Photo Shoot
First, have a clear idea of what kind of photos you want to take. Then, shoot according to your plan. And never settle just for a few photos. Make sure you’re taking enough photos so that you can get enough while doing post-processing.
7.1. Multiple Shoot from Different Angles
One or two angles are never enough for product photos. Try different angles, different perspectives to get your best shot. Also, your customers might want to see the product from different angles to understand the shape, size, and texture.
You will have to work with the images and improvise as you go along. One of the most important parts of photography is experimenting. The more experiments you’ll do, the better your images will get.
Also Read: Product Photography Pricing Guide – How Much Should You Charge?
8. Photography Post-Production

After your shoot, remember that photography post-production is as important as the shoot itself. Make sure you retouch your photos, ironing out the finer details so that your pictures look flawless. These changes may include color correction, removal of background, props, or unwanted shadows.
If you don’t have Photoshop, use free, but effective, image editing tools such as Pixlr and Canva for editing images. Fotor is a great image editing app you can use on your smartphone.
10 Common Product Photography Mistakes to Avoid
1. Using the wrong background
All images are made of background and foreground. Your background should be a support for your subject. An overpowering background will subside your subject. Again, a messy background will distract your viewers from the product. So, choose something that goes with your product, also maintains harmony.
2. Focus & Depth of Field
A sharp focus, along with focusing on the right place is essential for product photography. If you focus on the wrong place, you might lose important details of your product. So make sure your image is clear enough to show what you want to sell.
Depth of field shows the sharpness of an image. If you set the wrong aperture it might ruin your image. Understand when you need to blur some area of your image and when you need to show everything you have in your image.
3. Incorrect White Balance or color
Incorrect white balance or having inappropriate color might change the look of your image. One big problem with that is, when your customer will get a product that doesn’t match the image they saw online, then it definitely will give a negative impression about you and your company. And there is a good possibility of returning the product too.
4. Lack of appropriate Light
Photography is all about light and shadow. There is no way you can compromise with lighting in product photography. Measure the amount of light you need for your image. Set the lights and get the right exposure and then click the image.
5. Unusual Point of View
Experimenting and using creativity is always appreciated but don’t lose your mind while doing that. Point of view can not just change the perspective, but also it can change the size, shape, and dimension of your product.
Your product might appear bigger or smaller than it is in real because of your point of view. So, try to give a realistic view of the product.
6. Number of photos
Just one or two shots of the product often cause trouble during post-processing. There might be faults in your image which you won’t show immediately and only notice during post-production. Other than that, you might need images from different angles.
So, never be reluctant to take some extra shots of your product. To be on the safe side, you should keep photos from every angle. You never know when you will need which shot. Always keep backup shots.
7. Reflections and Shadows
If your product is made of glass or if it has a glossy surface, you need to give extra attention. You can use the reflection in a way that creates a unique visual effect, at the same time you can ruin the image because of reflections too.
Shadow can create dramatic effects. But you need to know how to utilize that in your photo. Having a shadow on the side that you want to show can ruin the image. Also, be careful about the direction, size, and intensity of the shadow, because that indicates the product’s shape.
8. Low Resolution
With all the great composition and beautiful background, your photo still might not work because of low resolution. Customers often zoom in on the image to get a clear idea about the product. If your image is of low resolution, your customers won’t get the chance to have a deeper look at your product.
Moreover, many e-commerce sites have specific requirements for product images. If your photographs don’t fit into their requirements, they might reject them.
9. Product is not prepared before shooting
Before shooting, your product needs to be well prepared and that’s a vital part of product photoshoot. If there is dust or scratch on the photo, it might show up on the image. Before shooting, make sure that your image is clean enough, well placed and it’s a flawless version.
10. Post-Production
Never publish your images just after shooting. No matter how clean your photography is, if it’s ecommerce product photography, you’ll always need to work on post-production. Retouch your photos, check the size and resolution before publishing the images anywhere.
FAQs on Product Photography
What type of lighting is best for product photography?
Both studio and natural lighting work for product photography if you know how to use it. But artificial lighting is recommended for a more professional looking image.
What is the best lens for product photography?
Prime lenses with lower aperture numbers are preferable for product photography.
Which camera is best for product photography?
Mirrorless or dslr both can work for product photography but have one with high resolution.
What ISO should I use for product photography?
You should keep the ISO as low as possible to avoid grain. It can be 100 or 200.
What is a good shutter speed for product photography?
If you’re using a tripod, it really doesn’t matter much what shutter speed you’re using. But if you’re not using a tripod or want to freeze a moment, use a faster shutter speed like 1/1000 or more.
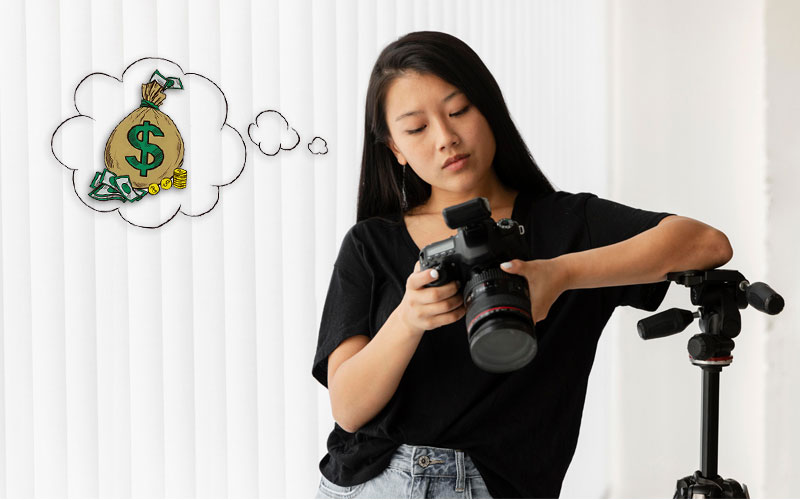
How much can a product photographer make?
Product photographers earning depends on his/her experience, location, types of clientele he/she has. However, the yearly amount is around $39k per year on an average (Statistics based on the US) .
How to decide on a perfect background for product photoshoot?
You can use either white or black background or use something that is lighter than the product color.
Final Thought
Product photography has a huge impact on both offline and online businesses. This can increase the sale as well as decrease it to a significant level because of the image quality.
So it won’t be wise to compromise with this sector. Commercial photography is a blend of technical and creative skills. The more you will practice, the more you will get better. And at the end, your photos will say for you.