For beginners, learning how to feather in Photoshop may seem like a hard task at first. But there is nothing to worry about. If you follow this tutorial, you will learn how to create a feathering effect like a pro in a short time.
Feathering can come in quite handy if you want to make edges smoother or create a blurring effect. It can be useful when you are putting two images together or creating a nice vignette. This effect can also help you make stunning illustrations.
To learn something as simple as to create smooth edges can take you a long way. It can improve your photo editing skills. With a blurring effect in Photoshop, you can even remove crowds in front of a landmark and make it stand out.
We have compiled the perfect guide to help you get started with photoshop feather edges. Beginners can learn how to make smooth edges in Photoshop with the help of this step-by-step guide. It can give you the confidence to make complex designs and improve your skills as a designer.
So, let’s begin our tutorial. First, let’s take a look at what feathering actually means in Photoshop.
How to Smooth Edges or Feather Edges in Photoshop
In Photoshop, softening the edges is termed “feathering”. This is a unique effect that gives a smoother appearance to your designs. It can make the transitions in your image look refined and soften a selection.
Whether you are trying to select a portion of your image, or you want to highlight a part, feathering can make it easier. It is particularly useful when merging two images. It can remove hard edges and make your image look more natural.
The process of getting refine edges in Photoshop is very simple. It would take you a little practice to grasp how to feather in Photoshop. Once you get the hang of it you will be creating a feather outline of images and selections in Photoshop like a professional photo editor.
NEED HELP? OFFSHORE Offering Photo Editing Service
How to Feather in Photoshop?
Now that we know what a feather effect is, let’s take a look at how to blur an image in Photoshop. This process is quite simple. If you are a beginner you can follow our step-by-step guide to get started.
Photoshop provides a Feather command in the Select menu option. (Select-> Modify-> Feather). But there is a drawback of using this command directly over a selection. It does not allow you to preview how the final result will look.
Watch this VIDEO tutorial –
There is a longer, but better way to achieve this. It will give you greater control over how your final design will look like. Let’s look at the process in more detail. Follow the steps below if you want to learn how to feather in Photoshop.
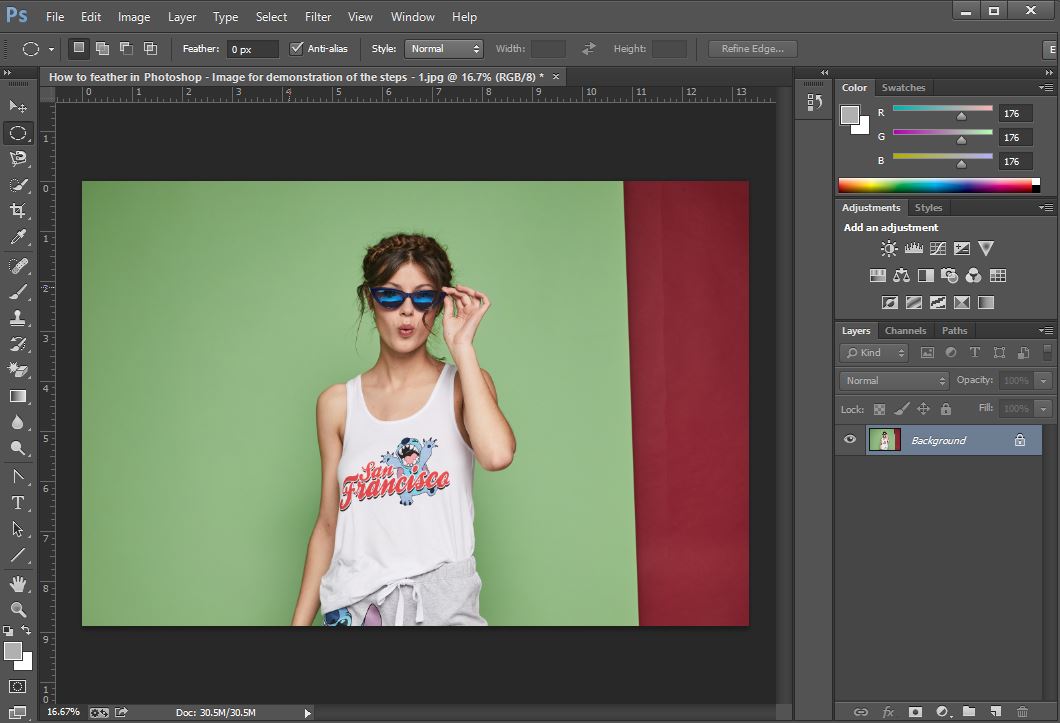
Step 1: Open the image
The first thing to do after you open the Photoshop application is to open your image. This image would be placed on the background layer and your canvas size will set according to the size of the image.
Once the image is opened in Photoshop, you are now ready to perform other actions on it, such as cropping and selecting portions of it. You are ready to learn how to feather in Photoshop.
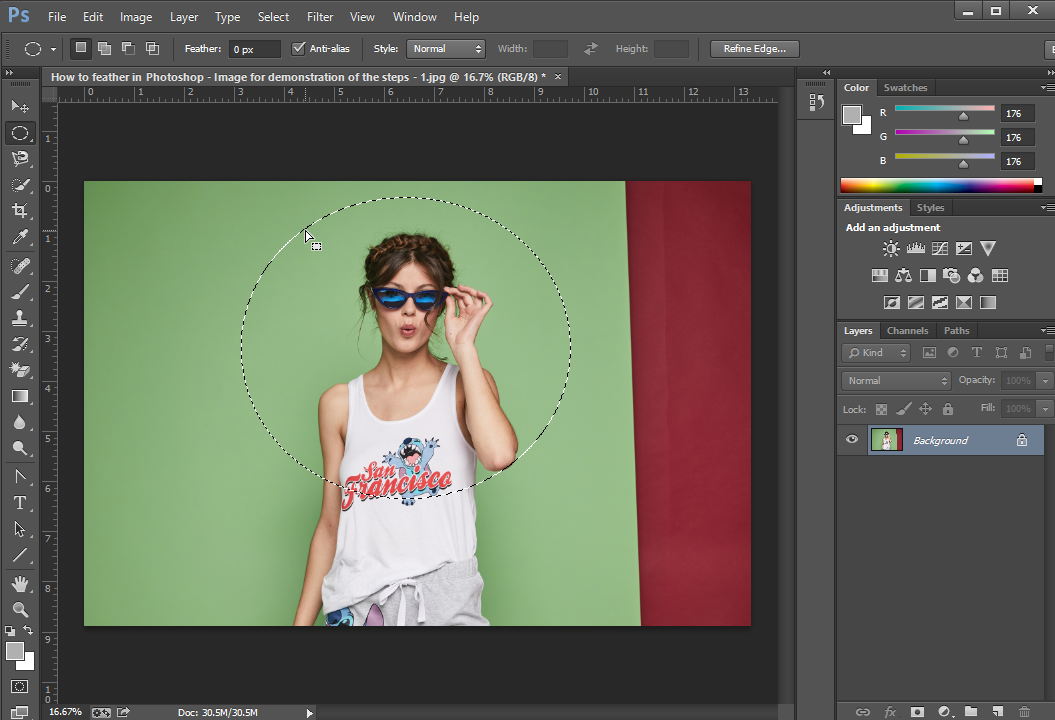
Step 2: Make a Selection
Photoshop offers various tools for selecting a portion of an image. There are the usual marquee tools, and then more advanced lasso tools. Depending on the shape of your selection, you can pick the tool that fits your needs.
Make a selection over your image and it will appear as a dotted line on the image. Photoshop makes it quite easy for the users to see the portion they have selected.
You can click on ‘Deselect’ in the Select menu to make another selection.
Step 3: Feather Your Selection
Now comes the most important part. We are going to see how to feather in Photoshop. Feathering your selection makes the edges softer. It is particularly useful when you want to take a portion of the image and add it to another image.
Once you have made your selection go to the Select menu and find the option that says ‘Refine Edges‘. If you want to understand how to smooth edges in Photoshop, this is the best way to do it. You will be able to preview the result before you apply the effect.
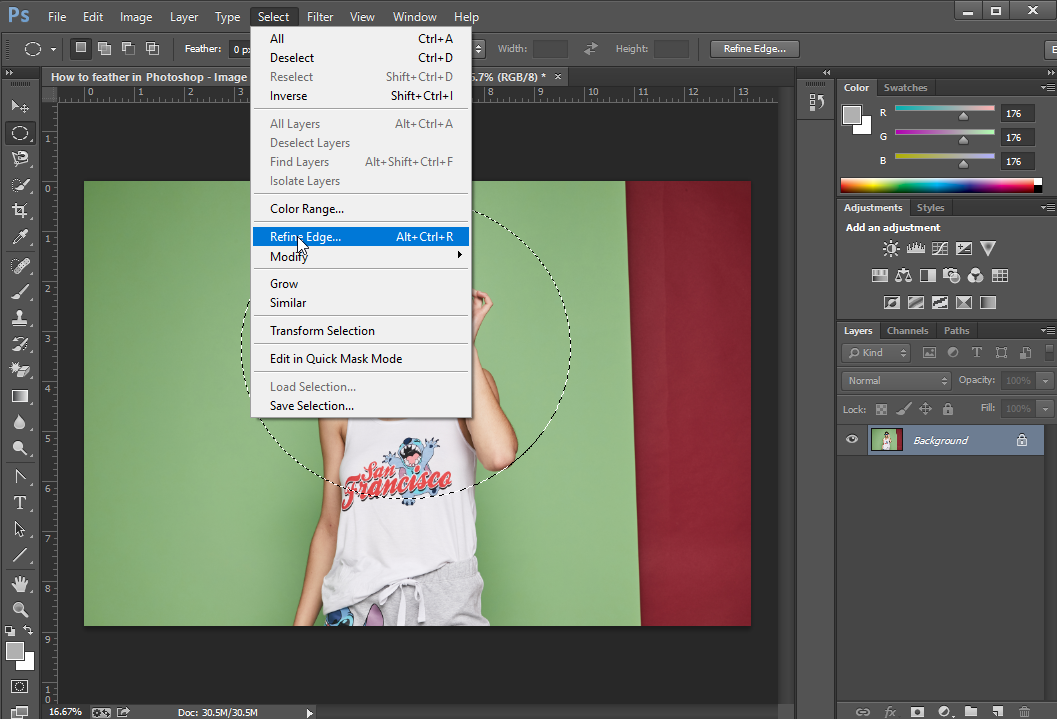
When you click on Refine Edges, a new menu will appear and you will enter into preview mode.
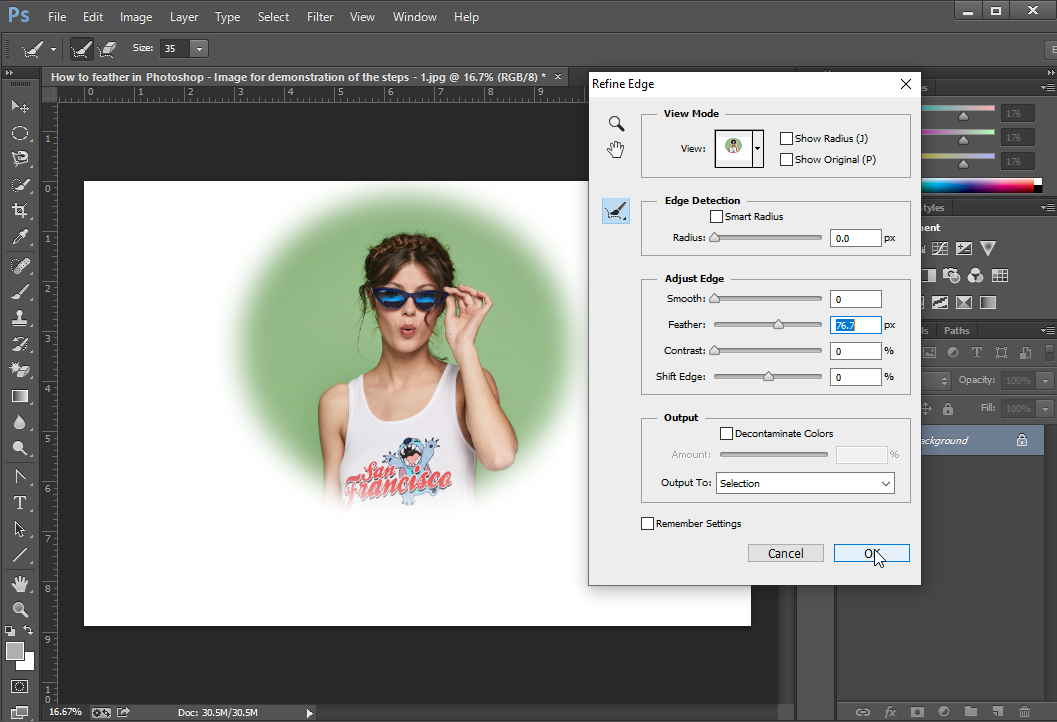
There are a lot of options, but we are only interested in the toggle that reads ‘Feather’. As you change the value of Feather, you will be able to see the results in the frame.

An important thing to remember is, the higher the feather value, the more blurred the edges will be. Keep the Feather value moderate for the best results.
If it is too low the edges on your selection will not soften. If it is too high, your entire selection can look blurred.
Click on ‘Ok’ to apply the changes to the selection.
After you click Ok, the feather effect as it was apparent in the preview mode will disappear on the screen. You will only be able to see the selection of the whole image, the same way as before you applied a feather effect on it.
There is nothing to worry about, next steps would make it clear how to view the feather outline on your selection.
Step 4: Copy the Selected Portion to another Layer
Now that you have applied the Feather effect on your selection, you are free to copy or cut the selection out of the main image. You can place it on another image or simply place it over a coloured layer.

Right-click on the edge of your selection to open a menu. Click on “Layer via Copy“. Immediately you will notice that a new layer will appear in the Layer Panel.
You can also use “Ctrl+C” to copy the selection, create a new layer, and use “Ctrl+V” to paste it.
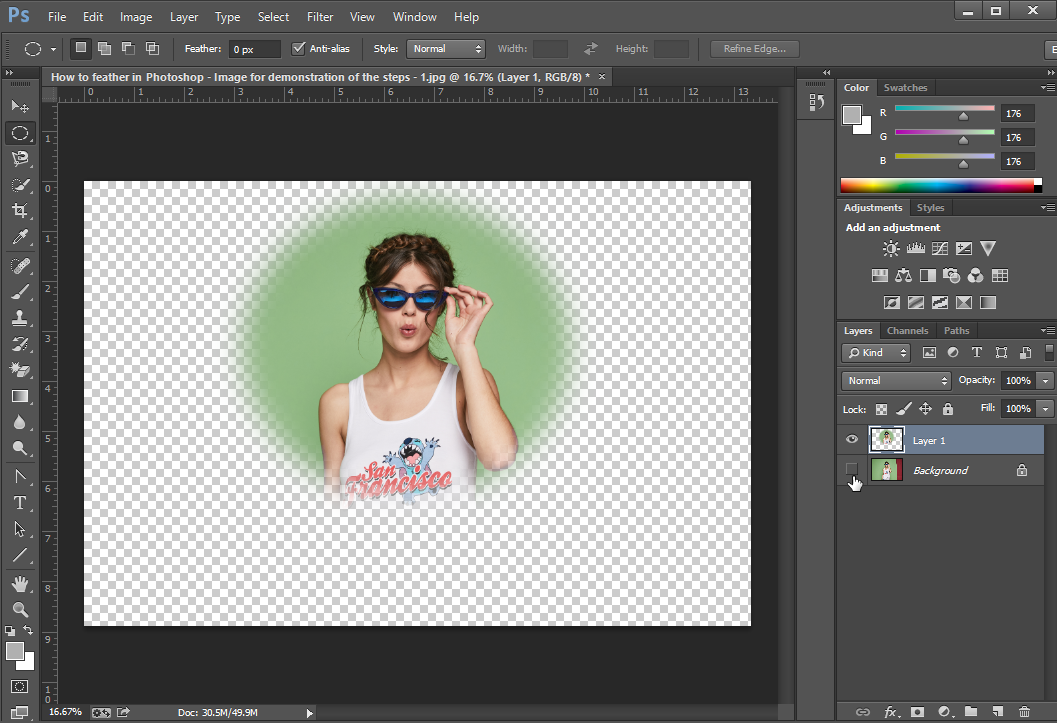
If you open the new Layer, you will be able to see your selection with the feather outline. Your selection is now ready to be combined with other images or to be used to create a new image.
Step 5: Apply Final Changes
Once you have learned how to feather in Photoshop, you can create interesting designs. To make your selection stand out, you can change background color or add a background image or a new layer underneath it.
We are going to create a new layer, and drag it under the layer with selection in Layer Panel. With the new layer selected, go to Edit and click on Fill. Add the color or pattern of your choice on the layer.
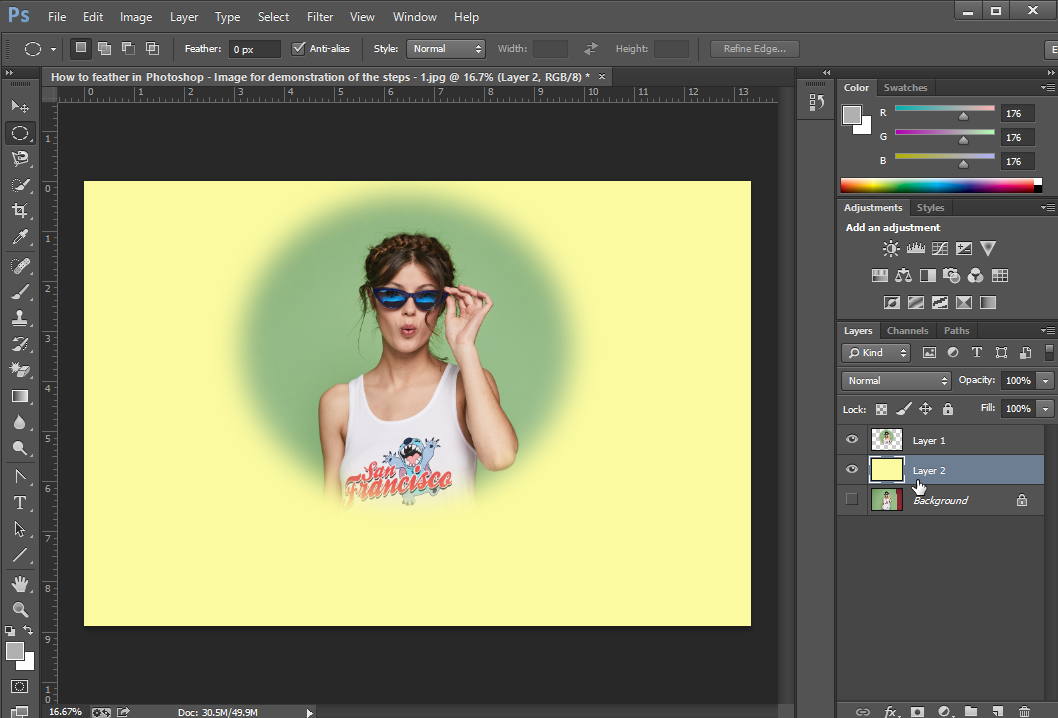
Now you would be able to clearly see the feather effect on the selection. We hope now you know how to feather in Photoshop.
Where Can You Use the Feather Effect in Photoshop?
We hope you had fun learning how to feather in Photoshop. You can experiment with different Feather values. It would take some practice to make your selections fit naturally into your designs. But it is not very hard, and you will soon get the hang of it.
Now let’s take a look at how you can combine different images using this technique. We take two images that are shown below, and we are going to put them both together to create a new design.

The next step is to use the Lasso tool to closely select the part of each image. Once you have selected a portion, you can proceed to apply the feather effect, following the same steps given above. Paste your selections on a new layer.
You can add the background of your choice. You can also use the third image, and add the selections from two images on it. Once your edges are feathered, you are free to do whatever you please with your selections.
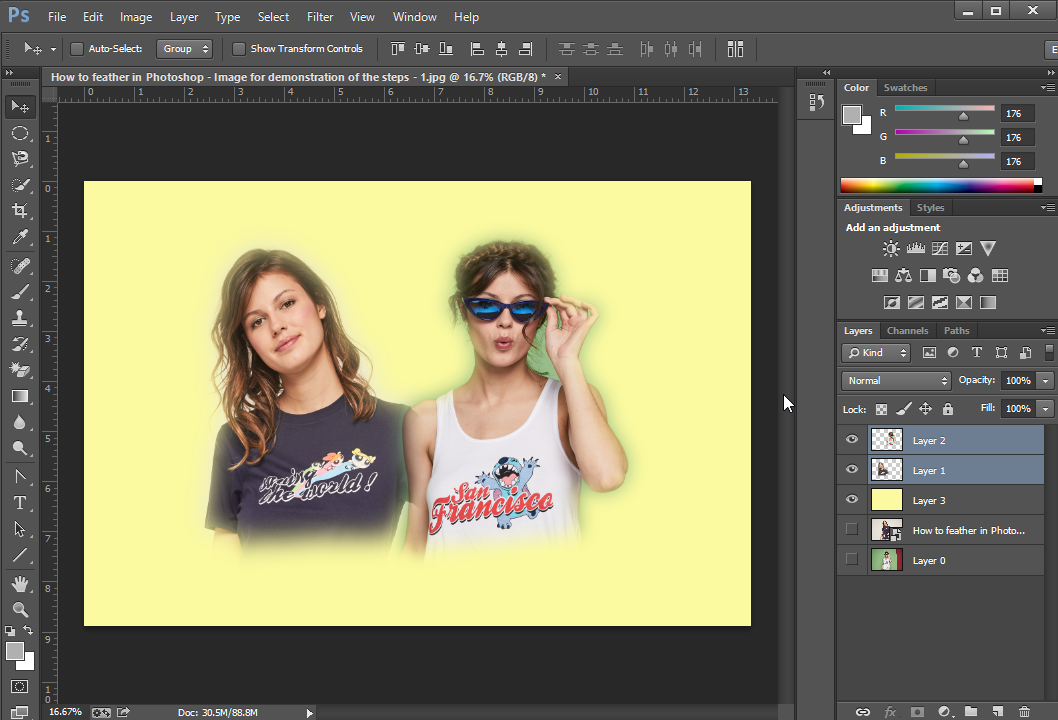
This is what our final image looks like. As you can see, the edges on both images look quite soft. It also becomes easy to make compositions in Photoshop with this technique.
There is much more you can do once you learn how to feather in Photoshop. You can use it to extract a part of the image, or make compositions, or create illustrations.
This is a great way to combine two images without any harsh edges It can also hide any imperfections in the selections.
So keep practicing and trying new things on Photoshop.
Final Verdict
Feathering selections is something that is used widely in Photoshop. If you are learning Photoshop, this skill will prove to be quite useful in the future. There is much you can do if you know how to feather in Photoshop.
In this tutorial, we saw what it actually means to smooth edges in Photoshop. Then we provided you with an easy guide to help you learn how to refine edges and selections. We also took a look at where you can use this trick.
If you are a beginner you need to remember it takes some practice to fully grasp it. But there is nothing you cannot achieve if you set your mind to it. Once you learn how to blur the background in Photoshop, you can experiment further.
We hope this tutorial was helpful to you. Let us know what you think about this tutorial, and how do you use the feathering effect in Photoshop?
So keep practicing and trying new things on Photoshop. Also, you can find clipping path service providers to get your job done.